Homemade Chalk
Toilet tissue tube or ice cube tray
Aluminum foil if you are using a toilet paper tube
Petroleum jelly if you're using an ice cube tray
Disposable plastic container
Plaster of Paris
Duct tape
Liquid tempera paint
Water
Spoon
1. Cover one end of the toilet paper tube with duct tape. Loosely roll an 8- by-41/2-inch piece of aluminum foil and slip it into the tube so that it lines the inside, fitting snugly. (Or coat the inside of the ice cube tray with petroleum jelly.)
2. Set tube upright (duct tape side down) on protected surface.
3. In a disposable plastic container, help your child mix 1 cup plaster of Paris with 1/2 cup water. Stir slowly and thoroughly until plaster is dissolved, about 1 minute.
4. Immediately add 2 tablespoons paint (or more for brighter chalk color, but be careful it can stain). Mix thoroughly.
5. Spoon into the tube (or ice cube tray). Tap gently so mixture settles to the bottom.
Let dry overnight before using.
I am a Stay at Home Mom of 3 kids, always looking for my next "project". I may not be perfect to everyone...but I'm perfect to those who matter most...My Family!
Showing posts with label children. Show all posts
Wednesday, July 6, 2011
Monday, March 7, 2011
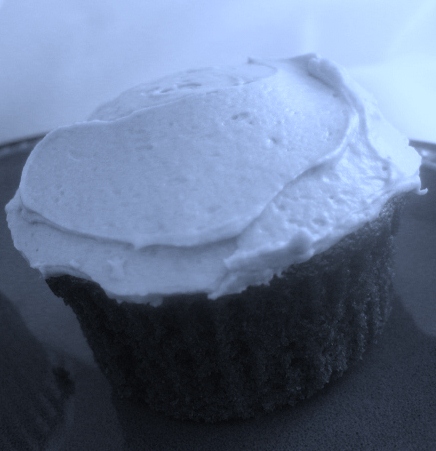
St Patrick's Day crafts & Chocolate Guinness Cupcakes
So its been a very busy few months here. I have been slacking with my blog and I hope to catch up soon. Right now in our home we are focusing on St Patrick’s Day. Of course we always have our corned beef and cabbage with soda bread. I usually make some kind of yummy green treat and maybe some mint chocolate chip ice cream. This year I have decided to try something new for dessert Chocolate Guinness Cupcakes…to go along with our ice cream.
Anjali has been working on a few crafts to decorate our home. The first one we made was a rainbow, made out of Froot Loops. The clouds are her hand prints in white paint. She had a blast making this one…not to mention ruining her lunch by eating half the Froot Loops! I suggest doing this at snack time…with a separate bowl for “eating” ones…just to be safe when using glue.
The second project was a shamrock. We had yellow and blue paint and discovered what happens when you mix the two together. Nothing really special here but a good color learning project. We cut it out and hung it on the front door.
The third project we completed so far is Goodluck Bear from the Care Bears. I had her spread glue over the entire picture then she covered the whole things with pieces of crepe paper (or you can use green tissue paper). She had fun tearing the pieces before hand and then sticking them on the glue. It turned out cute, we cut it out and put it onto pink construction paper. We will be doing this same process with shamrocks later this week. For the shamrocks I don’t use construction paper, just plain computer paper so when we hang them in the window they become kind of translucent. Very pretty window decorations.
Chocolate Guinness Cupcakes Recipe
Cupcake Ingredients:
2 large eggs, at room temperature
1/2 cup plain yogurt, at room temperature
6 oz. dark stout (like Guinness), at room temperature (*measure after the foam has settled)
2 tsp. vanilla extract
1/2 cup cocoa powder
1 cup sugar
1 1/4 cups all-purpose flour
1 tsp. baking soda
1/8 tsp. ground cinnamon
6 Tbsp. butter, melted
Frosting Ingredients:
8 ounces cream cheese, at room temperature
4 Tbsp. butter, at room temperature
4 cups powdered sugar
1 tsp. vanilla extract
Directions:
1. Preheat oven to 350 degrees. Line a 12-cup cupcake pan with cupcake papers; spray the whole thing including the cupcake papers, with nonstick spray. Set aside.
2. Melt butter in microwave or on stovetop, then set aside.
3. In a mixing bowl, whisk together eggs and yogurt. Add beer and vanilla whisk until well combined.
4. Sift all the dry ingredients together (cocoa powder, sugar, flour, baking soda, and cinnamon) into a separate bowl.
5. Add about a third of the flour mixture into the wet ingredients and blend well using a mixer on low speed, or a hand mixer. Add the rest of the flour mixture, a third at a time, mixing well after each addition. When all ingredients are blended, add the melted butter then continue mixing until very well combined.
6. Pour batter into the 12 cups, filling each only about 3/4 full. Bake on center rack of the preheated 350 degree oven and for approximately 25 minutes. When cupcakes are done (toothpick inserted in center of a cupcake will come out clean), let cool for ten minutes then remove cupcakes from pan and let them cool completely on wire rack.
To make the Frosting:
1. In a medium bowl, blend together cream cheese, butter, and vanilla.
2. Gradually add powdered sugar, mixing well until it’s all incorporated. * Use immediately
Friday, January 21, 2011
Free purse book, Valentines Day & Raspberry Oatmeal Bars!
I love free or close to free stuff…who doesn’t! Today I ordered a purse photo book from Walgreens for free. It’s a great gift that I plan on giving my mother and grandmother, neither of them being iphone “compatible“, for Mothers Day. The code can be used multiple times, all I paid was $3.20 for tax and shipping…which means I don’t even have to travel to Walgreens for my photo book!
(1) 4.5” x 6” Purse book = $6.99
Coupon code: Purse = -$6.99
Standard S&H = $2.99
Sales Tax = $0.21
-------------------------------------------
Total Price = $3.20
For the next month I will be in “Love” mode. I will be planning Valentines Day crafts for the kids to do. I have a fun song that I sing with Anjali, along with cut out hearts that we use as visual. This teaches her color, shape, and numbers. The picture and song below are for red but I cut out every color of the rainbow to use for this song.
This weeks homemade treat is Raspberry Oatmeal Bars. They are very yummy with the original recipe but I will be altering them this weekend to include ½ cup of pureed beets. I’m a little nervous about this one so I will be posting the taste results after I do it… Stay tuned! Until then enjoy the original recipe below.
Raspberry Oatmeal Bars
2 cups Old Fashioned oats
1 ¼ cup flour
½ cup sugar
½ teaspoon cinnamon
½ tsp baking powder
¼ tsp salt
1 tsp vanilla extract
¾ cup spread able margarine
1 cup raspberry preserves
1 cup dried cranberries (optional)1. Preheat oven to 375 degrees. Coat baking pan with cooking spray.
2. In a large bowl combine oats, flour, sugar, cinnamon, baking powder, salt, and vanilla. Stir well.
3. Add the margarine in quickly until the ingredients are not powdery any more. Do not over mix, some of the margarine may still be visible.
4. Take about ½ of the oat mixture and press it into the bottom of the pan firmly. Bake about 13 minutes. The edges will be lightly brown but not fully baked.
5. Spread the raspberry preserves over the baked oat layer. Then sprinkle the remaining oat mixture over the preserves. (I like to add dried cranberries to the remaining oat mixture before sprinkling over the preserves) Bake for about 20-25 minutes or until golden brown.
6. Let pan cool completely before cutting into bars. Serve and enjoy J
(1) 4.5” x 6” Purse book = $6.99
Coupon code: Purse = -$6.99
Standard S&H = $2.99
Sales Tax = $0.21
-------------------------------------------
Total Price = $3.20
For the next month I will be in “Love” mode. I will be planning Valentines Day crafts for the kids to do. I have a fun song that I sing with Anjali, along with cut out hearts that we use as visual. This teaches her color, shape, and numbers. The picture and song below are for red but I cut out every color of the rainbow to use for this song.
Hearts! (Tune: 1 little 2 little 3 little Indians)
One red, two red, three red hearts,
Four red, Five red, Six red hearts,
Seven red, eight red, nine red hearts
Ten red hearts for you!
~ Repeat with all different colors.
This weeks homemade treat is Raspberry Oatmeal Bars. They are very yummy with the original recipe but I will be altering them this weekend to include ½ cup of pureed beets. I’m a little nervous about this one so I will be posting the taste results after I do it… Stay tuned! Until then enjoy the original recipe below.
Raspberry Oatmeal Bars
2 cups Old Fashioned oats
1 ¼ cup flour
½ cup sugar
½ teaspoon cinnamon
½ tsp baking powder
¼ tsp salt
1 tsp vanilla extract
¾ cup spread able margarine
1 cup raspberry preserves
1 cup dried cranberries (optional)1. Preheat oven to 375 degrees. Coat baking pan with cooking spray.
2. In a large bowl combine oats, flour, sugar, cinnamon, baking powder, salt, and vanilla. Stir well.
3. Add the margarine in quickly until the ingredients are not powdery any more. Do not over mix, some of the margarine may still be visible.
4. Take about ½ of the oat mixture and press it into the bottom of the pan firmly. Bake about 13 minutes. The edges will be lightly brown but not fully baked.
5. Spread the raspberry preserves over the baked oat layer. Then sprinkle the remaining oat mixture over the preserves. (I like to add dried cranberries to the remaining oat mixture before sprinkling over the preserves) Bake for about 20-25 minutes or until golden brown.
6. Let pan cool completely before cutting into bars. Serve and enjoy J
Tuesday, November 30, 2010
Birthday around the Holidays!
Each year we have a small family “party” in November where we celebrate my daughters birthday. We do this because I want to make sure that my daughter, who’s birthday is on December 13th, never feels that her birthday is overshadowed by the holiday season. Then on her actual birthday we have a cake and open her present from mommy, Daddy, and Big brother. But I still worried that as she gets older she will feel like her birthday isn’t as important since Christmas is celebrated all months long. This prompted me to alter our Christmas traditions for now on.
We decided that Our Christmas tree and stockings will not go up until after her birthday. It actually works better this way since we get a real tree and this will make it last longer without pine needles all over the floor (my vacuum will thank me this year!). Our Book advent calendar is being shortened to 12 days, and will go up on her birthday. The first book will always be a non-Christmas book, and part of her birthday gift.
We will still have our two other Christmas countdowns that will start on December 1st like normal. The first one is your typical Santa Beard Count down, with cotton balls. The second one is our Christmas banner countdown, that spells out We Wish You A Merry Christmas by the time Christmas eve arrives! This way each day the children can each get to do one of the calendars, alternating between the two.
For Anjali’s Birthday this year we will start her birthday off with yummy ice cream cone cupcakes and then open our first Book of our advent calendar. This year it will be “Happy Birthday Biscuit”, perfect for a child who thinks she is a puppy! I’m hoping by making these small changes she will never think her birthday is less important. I believe that everyone deserves to feel special on and around their birthday, especially children.
Thursday, November 25, 2010
Thanksgiving Day Parade float = major fail
During the Thanksgiving day Parade I noticed a float called Castle of Dreams created by My Princess Academy. Along with their cute float they had Keri Hilson perform a song called “Pretty Girl Rock”. After hearing just a few sentences from her song…that seemed completely inappropriate for the float I had to look up the website. On their website they encourage the following beliefs: In order to be a My Princess Academy princess you must learn the 4 pillars of "Real Princesses" - Generosity, Intelligence, Beauty and Confidence.
This is quoted directly from their website for the parents: “Girls have always dreamed of becoming Princesses...In the past, that meant they were shown a beautiful, idealized version of a Princess and told to go imitate her. But something was missing. Girls were never shown how to be their own kind of Princess their best selves, defined not only by physical beauty but by inner beauty.”
So back to the song that was performed on the float. It was called “Pretty Girl Rock” by Keri Hilson and I’m going to highlight some of the lines that stood out to me.
You can watch it here:
http://www.youtube.com/watch?v=1vMY1UO8P48&feature=player_embedded
This is quoted directly from their website for the parents: “Girls have always dreamed of becoming Princesses...In the past, that meant they were shown a beautiful, idealized version of a Princess and told to go imitate her. But something was missing. Girls were never shown how to be their own kind of Princess their best selves, defined not only by physical beauty but by inner beauty.”
So back to the song that was performed on the float. It was called “Pretty Girl Rock” by Keri Hilson and I’m going to highlight some of the lines that stood out to me.
My name is Keri, I’m so very
Fly, oh my, it’s a li’l bit scary
Boys wanna marry, looking at my derri-ere, you can stare but if you touch it ima bury
Fly, oh my, it’s a li’l bit scary
Boys wanna marry, looking at my derri-ere, you can stare but if you touch it ima bury
Pretty as a picture
Sweeter than a swisher
Mad cause I’m cuter than the girl that is with ya
Sweeter than a swisher
Mad cause I’m cuter than the girl that is with ya
I ain’t gotta talk about it baby you can see it
But if you want ill be happy to repeat it
All eyes on me when I walk in,
No question that this girl’s a 10 Don’t hate me cause I’m beautiful. Don’t hate me cause I’m beautiful. My walk my talk the way I dress It’s not my fault so please don’t trip
Don’t hate me cause I’m beautiful Don’t hate me cause I’m beautiful
No question that this girl’s a 10 Don’t hate me cause I’m beautiful. Don’t hate me cause I’m beautiful. My walk my talk the way I dress It’s not my fault so please don’t trip
Don’t hate me cause I’m beautiful Don’t hate me cause I’m beautiful
Now were you at, If your looking for me you can catch me
Cameras flashing, daddies turned his head as soon as I passed him Girls think I’m conceded cause I think I’m attraction
Don’t worry about what I think why don’t you ask him
Cameras flashing, daddies turned his head as soon as I passed him Girls think I’m conceded cause I think I’m attraction
Don’t worry about what I think why don’t you ask him
Get yourself together don’t hate(don't do it), jealous is the ugliest trait(ohh, don't do it)
I can talk about it cause I know that I’m pretty
If you know it too then ladies sing it with me
I can talk about it cause I know that I’m pretty
If you know it too then ladies sing it with me
Now I have to admit the song was catchy and I would probably dance to it in the car if I heard it but as a mother I have to say that this was the wrong performance for this particular float…that was meant to encouraging “inner strength” in young girls.You can watch it here:
http://www.youtube.com/watch?v=1vMY1UO8P48&feature=player_embedded
Saturday, November 20, 2010
Homemade Ornaments & Chewy Molasses Cookies
Every year while my son is at school and my husband is working I go out and pick a Christmas tree. I like taking my time to find the “one”, getting it home, letting the branches drop, making sure that it is all ready when everyone comes home that day. In fact in the 7 years that I’ve had my own family I only missed this tradition once…while on bed rest with my daughter. Growing up we usually went out together as a family and cut a tree down at a local tree farm. A tradition I will probably start with my family when my children get a bit older, but for now Mommy gets to surprise the family with a tree each year.
My mothers tree is full of ornaments, old and new, many of them made by us as children and full of memories. It the one thing that I miss the most about the family Christmas tree. Our tree has the typical “Baby’s 1st Christmas” ornaments and many store bought ones as well. It is very festive and beautiful but just isn’t the same. So I have started a new tradition with my children, each year they each make a Homemade ornament. So one day our Christmas tree will be filled with homemade ornaments and lots of memories.
Salt Dough Ornaments
1 cup all-purpose flour
1/2 cup table salt
1/2 cup warm water
cookie cutters
straw
paints/glitter/glue/beads/food coloring (to decorate)
ribbon (to hang)
Directions:
Mix ingredients in a bowl then knead on a floured surface, incorporating more flour as needed until the dough is pliable and not sticky. Roll out as you would do for cookies, about 1/4 inch thick. Cut out with cutters and place on baking tray. Make a hole at the top of the cookie with the straw. Bake in a 200 degree oven for 2 hours or until hard. When cool, paint & decorate, let dry. Hang ornaments with ribbon.
* I suggest painting a coat of clear polyurethane finish (you can get it at any Michaels or Wal-Mart) to your completed ornaments. It makes it extra shiny and will keep for years. You can make multiple batches and add food coloring to each for extra fun.
Chewy Molasses Cookies
3/4 cup butter, melted
1 cup brown sugar
1 egg
1/4 cup molasses
2 cups all-purpose flour
1 teaspoons baking soda
1/2 teaspoon salt
1 teaspoon ground cinnamon
1/2 teaspoon ground cloves
1/2 teaspoon ground ginger
1/2 cup white sugar (for rolling)
Directions
In a medium bowl, mix together the melted margarine, 1 cup brown sugar, and egg until smooth. Stir in the molasses. Combine the flour, baking soda, salt, cinnamon, cloves, and ginger; blend into the molasses mixture. Cover, and chill dough for 1 hour. Preheat oven to 375 degrees F. Roll dough into walnut sized balls, and roll them in the white sugar. Place cookies 2 inches apart onto ungreased baking sheets. Bake for 8 to 10 minutes in the preheated oven, until tops are cracked. Cool on wire racks.
Tuesday, November 9, 2010
My daughters Mullet & Iced Pumkin Cookies
So yesterday while talking to my mother on the phone my daughter decided to cut off her hair! Yes ladies and gentleman...she butchered it! I know have a 3 1/2 year old daughter with a mullet, and I'm very upset. I know that I should have been more upset that she was playing with scissors, or thankful that she didn't cut herself but nope...I was so angry that her beautiful hair was gone. The hair that took us almost 4 years to actually grow...she now looks like a boy!
Looking back now I guess I could have handled my reaction better, but in the heat of the moment all I could do was yell. Not directly at her but to the world and anyone who could her me. Mostly "Oh my Goodness she looks like a boy" and "Its ruined, we can't fix that!". Me getting upset resulted in her getting upset. So I calmed myself down, ran to the store and bought as many headbands and clips as I could find. I told her that it was okay because she was going to look beautiful after we fixed it.
So this morning we headed to the hair salon and the lady ensured me that they deal with this kind of thing all the time. She talked to Anjali about visiting the salon next time she wanted a haircut and showed me the best way to comb her hair to cover the bald patches. So after the salon we came home and baked Homemade pumpkin Pies...nothing better than a yummy homemade treat and a wonder smelling house!
I know in time I will look back and laugh about the whole thing but for now I just want to forget about it. Tomorrow's ballet class will be interesting! I do know that in the future when my daughter is crying to me that her baby cut off her beautiful hair....I can now say "That's what you get"! Tomorrow we will be lifting my spirits with yummy Iced Pumpkin cookies...enjoy!
Ingredients
2 1/2 cups all-purpose flour
1 teaspoon baking powder
1 teaspoon baking soda
2 teaspoons ground cinnamon
1/2 teaspoon ground nutmeg
1/2 teaspoon ground cloves
1/2 teaspoon salt
1/2 cup butter, softened
1 1/2 cups white sugar
1 cup canned pumpkin puree
1 egg
1 teaspoon vanilla extract
Icing
2 cups confectioners' sugar
3 tablespoons milk
1 tablespoon melted butter
1 teaspoon vanilla extract
Directions
1. Preheat oven to 350 degrees F (175 degrees C). Combine flour, baking powder, baking soda, cinnamon, nutmeg, ground cloves, and salt; set aside.
2. In a medium bowl, cream together the 1/2 cup of butter and white sugar. Add pumpkin, egg, and 1 teaspoon vanilla to butter mixture, and beat until creamy. Mix in dry ingredients. Drop on cookie sheet by tablespoonfuls; flatten slightly.
3. Bake for 15 to 20 minutes in the preheated oven. Cool cookies, then drizzle glaze with fork.
4. To Make Glaze: Combine confectioners' sugar, milk, 1 tablespoon melted butter, and 1 teaspoon vanilla. Add milk as needed, to achieve drizzling consistency.
| Last Month before the "incident" |
| Directly after...patches of hair missing! |
| After the salon...and a combover! |
| Yummy Pumpkin Pies! |
Ingredients
2 1/2 cups all-purpose flour
1 teaspoon baking powder
1 teaspoon baking soda
2 teaspoons ground cinnamon
1/2 teaspoon ground nutmeg
1/2 teaspoon ground cloves
1/2 teaspoon salt
1/2 cup butter, softened
1 1/2 cups white sugar
1 cup canned pumpkin puree
1 egg
1 teaspoon vanilla extract
Icing
2 cups confectioners' sugar
3 tablespoons milk
1 tablespoon melted butter
1 teaspoon vanilla extract
Directions
1. Preheat oven to 350 degrees F (175 degrees C). Combine flour, baking powder, baking soda, cinnamon, nutmeg, ground cloves, and salt; set aside.
2. In a medium bowl, cream together the 1/2 cup of butter and white sugar. Add pumpkin, egg, and 1 teaspoon vanilla to butter mixture, and beat until creamy. Mix in dry ingredients. Drop on cookie sheet by tablespoonfuls; flatten slightly.
3. Bake for 15 to 20 minutes in the preheated oven. Cool cookies, then drizzle glaze with fork.
4. To Make Glaze: Combine confectioners' sugar, milk, 1 tablespoon melted butter, and 1 teaspoon vanilla. Add milk as needed, to achieve drizzling consistency.
Saturday, November 6, 2010
Things my Mom use to Say!
As children we are in such a rush to grow up. You want to make your own rules without having to answer to anyone. Then you become an adult and can’t help but think back to the days when times and decisions were simpler. When I was a child I swore that my mother didn’t know what she was talking about. It wasn’t until I became a mother myself that I realized she was probably the smartest women I’ve ever known! These are the Top 10 saying that I swore I would never say to my own children…until I had my own children…now they are part of my daily routine!
1. As long as you live under my roof, you'll do as I say.
2. Money doesn’t grow on trees.
3. Shut that door! I'm not heating (or air conditioning) the whole neighborhood!
4. When I was a little girl...
5. When you have your own house then you can make the rules!
6. I’m not feeding the whole neighborhood!
7. Think of those poor starving children in Africa!
8. Do you think we own the electric company?
9. Your too young, ask me again in a few years.
10. Why? Because I said so, that's why!
Tuesday, November 2, 2010
Goodbye October - Cowboy Cookies
So another Halloween has come and gone. This year was different from the others. Conner and Andrew left around 9:30am to head to the Jets vs Patriots game. It was Conner's first Football game and he had a great time. He got to eat anything he wanted, drink any soda he wanted, and came home with plenty of souvenirs! Plus he won 2 Sanchez bobble heads that I had to pick up at PC Richards Monday morning :)
While the boys had a football day together Anjali and I enjoyed a girls Halloween. We filled our candy bowl, cleaned the house, and got dressed for trick or treating. Anjali was a Princess and I even let her wear Mommy's make-up as a special treat. We went out trick or treating with our neighbors, who also happen to be my sons best friends. We got half a bag full of candy!
Conner and Andrew got home around 6:30pm, just in time to get dressed and go out for more candy. Conner was a SWAT member for Halloween. This time around Conner and Daddy went trick or treating. They came home with more than enough candy to last us until next year!
I went through the candy to make sure nothing was opened or suspicious and put it all into one large bag. I weighed it to see how much we got...12 pounds of candy! How a 7 year old and 3 year old could manage to get 12lbs of candy in one night is beyond me.
So another October has ended and my focus is now on Thanksgiving! My favorite time of year is between November 1 - January 1. No other time during the year makes you focus on the ones you love as much as this time does. So to say goodbye to October and hello to November we made yummy Cowboy Cookies, enjoy!
Cowboy Cookies
Ingredients
2 cups all-purpose flour
1 teaspoon baking powder
1 teaspoon baking soda
1/2 teaspoon salt
1 cup butter, softened
1 cup white sugar
1 cup packed brown sugar
2 eggs
1 teaspoon vanilla extract
2 cups rolled oats
1 cup semisweet chocolate chips
Directions
Preheat oven to 350 degrees F (175 degrees C). Grease baking sheets. Sift together the flour, baking powder, baking soda, and salt. Set aside.
In a large bowl, cream together the butter, white sugar, and brown sugar until light and fluffy. Beat in the eggs one at a time, then stir in the vanilla. Gradually stir in the sifted ingredients. Stir in the rolled oats and chocolate chips*. Drop by rounded teaspoonfuls onto the prepared baking sheets.
Bake for 8 to 10 minutes in the preheated oven. Allow cookies to cool on baking sheets for 5 minutes before removing.
* we also added crushed walnuts with the chocolate chips.
Friday, October 29, 2010
Fall Fest & Cranberry Bread
Today my sons school celebrated Fall Fest. Unlike most other school they do not have the children wear there costumes and have a parade and party. Instead they create a Fall fest for the children during the day and hold a Masquerade Ball in the evening. At school the main hallway is transformed into a Fall pumpkin patch where the classrooms hang their decorated pumpkins. Each class creates a large pumpkin and the school votes on the best one. During Fall Fest the children go through a “haunted” maze set up in the library and a “treasure hunt” outside. Then they make there way to the cafeteria where stations are set up. Kindergarten & 1st grade make goody bags for the local shelter daycare and the 2nd & 3rd graders make a bagged lunch for the children at the daycare. Then there are two crafts, making a mask and making a backpack pull(kinda like a keychain). During the crafts the children are visited by the school mascot, Al E Gator…if you didn’t figure it out he’s an alligator. Then in the evening the school holds a family masquerade ball where the children can show off their costumes and enjoy music and Halloween treats! The children enjoy a fun filled day, they help out the community, and families get to spend the evening together. Then Saturday is recovery day for the PTA volunteers!
When we returned home today Conner gave Anjali a small toy he had found on the treasure hunt. He told her that he had brought it home for her. She jumped up grabbed him by the neck and hugged him. Then he pulled out his uneaten snack from school and said she could have that also, but quickly added “You aren’t going to freak out and do something like hug me again are you?” It was so cute!
To welcome the cold weather I’m making Cranberry Bread as a treat this weekend. With a yummy vanilla glaze on top…it is so good!
Cranberry Bread
2 cups all-purpose flour
1 1/2 teaspoons baking powder
1/2 teaspoon baking soda
1/2 teaspoon salt
1 tablespoon grated orange zest
1 1/2 cups fresh cranberries
1/4 cup margarine, softened
1 cup white sugar
1 egg
3/4 cup orange juice
Preheat the oven to 350 degrees F. Grease a 9x5 inch loaf pan. Whisk together flour, baking powder, baking soda, and salt. Stir in orange zest. Set aside.
In a large bowl, cream together margarine, sugar, and egg until smooth. Stir in orange juice. Beat in flour mixture until just moistened. Add in cranberries. Pour into prepared pan.
Bake for 1 hour in the preheated oven, or until the bread springs back when lightly touched. Let stand 10 minutes, then turn out onto a wire rack to cool. Wrap in plastic when completely cool.
Monday, October 18, 2010
Start a Tradition
When I came across this idea and I knew that I had to do it! This Christmas book Advent Calendar not only counts down to the exciting day but it also creates a family memory every night for 24 nights! Choose 24 Christmas/Holiday themed books, they can be ones you already own or ones you buy new, if you reuse them each year it pays for itself, and wrap each book in Holiday paper. Then use gift tags to number them from 1-24. You can use store bought gift tags or make your own. You can place it across a buffet table, a window seat or like myself you can place it on top of our fireplace mantle.
This is our calendar this year:
1. Bear Noel By: Olivier Dunrea
2. Christmas Mice! By: Bethany Roberts
3. Things I See at Christmas By: Julie Stiegemeyer
4. Down Through the Chimney By: Twin Sisters Productions Staff
5. The Littlest Christmas Tree By: R.A Herman
6. Little Engine That Could Snowy, Blowy Christmas By: Watty Piper
7. The Littlest Christmas Star By: Brandi Dougherty
8. Donald’s Christmas Gift By: Sheila Sweeny Higginson
9. D. W.’s Perfect Present By: Marc Brown
10. The Christmas Cookie Case By: Scholastic, Inc. Staff
11. Funny Hunny Christmas By: Random House Disney Staff
12. The Berenstain Bears and the Joy of Giving By: Jan Berenstain
13. The Story of the Nutcracker Ballet By: Deborah Hautzig
14. The Christmas Star By: Elizabeth Raum
15. Willow At Christmas By: Camilla Ashforth
16. Mickey’s Twice Upon A Christmas By: Gemstone Publishing, Inc
17. The Little Christmas Tree By: Mercer Mayer
18. Clifford’s First Christmas By: Norman Bridwell
19. Rudolph The Red-Nosed Reindeer: A Holly Jolly Christmas!
20. Frosty the Snowman: A Musical Book By: Jack Rollins
21. Duck & Goose It’s Time for Christmas By: Tad Hills
22. Merry Christmas, Stinky Face By: Lisa Mccourt
23. Snowmen at Christmas By: Caralyn Buehner
24. The Night Before Christmas By: Clement C. Moore
Each year you can also change the order of the books, leaving your child wondering when their favorite will be read…of course always leaving the best book for last! You can also take out the books your children outgrow and replace them as your children get older. The point is that during a time that stress can be overwhelming and time can get away from you, this will make you stop and enjoy a few minutes with your family every night until Christmas! A tradition your children will remember for the rest of their lives.
Sunday, October 10, 2010
Homemade is the way to go!
So I have been feeling very creative lately. I am starting to do more projects around the house in preparation for the Holidays. The kids and I will be making home-made pretzels tomorrow after the baseball game. This is the recipe I will also be using as gifts for the Holidays, along with our homemade Christmas cookies.
The recipe I use makes two 16oz jars that I will give as gifts for the holidays. I cover the lid with cloth and tie some ribbon around the lid, add the recipe card and done! The total cost for me to make 12 of these gifts is about $40. That includes buying the mason jars, the cloths and ribbons, and the cost of buying all new spices (most of which I already have plenty of). So my actual cost will be much lower since all I have to buy is the yeast and parmesan cheese…and maybe an extra bag of flour.
We are also making homemade crayons. it’s a great way to reuse all of the broken and wasted crayons that are found through out the house during the year. Holiday silicone molds are the best…and you can find them in so many different themes! First separate the crayons by color (reds, blues, greens, etc…) and cut them into small pieces(remove any paper). Put the crayon pieces into the molds. Bake in oven at 225 degrees until completely melted. Let it set for a few minute before transferring them into the refrigerator. After about 15 minute in the fridge they should just pop out of the molds like butter! Great homemade gift to give children!
The last activity will be for my new nephew. I am making him a framed monogram made out of crayons. Its so easy to make and very cheap if you find a cute frame like I did at the dollar store. I may even make one for Conner’s teacher this year.
Beer Bottle Pretzel Mix In A Jar
3 1/3 cup whole wheat flour (or unbleached all-purpose flour)
1 tbs. sugar
1 package active dry yeast
1 tsp. salt
1/2 tsp. dried oregano
1/4 tsp. dried basil
1/4 tsp. garlic powder
1/2 cup grated parmesan cheese
Stir together flour, sugar, yeast, and salt in a bowl. Stir together oregano, basil, garlic, onion, and cheese in another. Divide ingredients equally among two 16 ounce beer bottles or jars, layering if bottles are clear. This recipe makes 2 separate jars. If giving as gifts, tie a ribbon around the jars, and make sure to attach the directions below to the gift.
Beer Bottle Pretzels
1. Empty 1 jar into a medium mixing bowl. Add 1/2 of a 12 oz can or bottle of beer (3/4 cup). Stir to combine. Knead on lightly floured surface until smooth. Cover and let rest in a warm area until doubled. (About 45 min.)
2. Roll out on lightly floured surface into a 10'x6' rectangle and cut lengthwise into 6 strips. (Shape if desired or leave as strips.) Cover and let rise again until nearly doubled; about 30 min. Spritz with water and add sea salt or other topping *alternative option below.
3. Bake on the top rack of a 400 degrees F oven for about 8 minutes or until lightly golden. Transfer to wire rack to cool.
* Alternative option: If you want to boil them first, bring a pot of water to a boil. Dunk each of the pretzels into the boiling water for 5 seconds, then place them onto a baking sheet and sprinkle with coarse salt or other toppings. Use a pair of spatulas to hold the pretzel in place while holding it under water. This option makes better pretzels!
Saturday, October 9, 2010
Babies & French Toast
Today I became an Aunt for the first time. I am the oldest of 5 children and my husband is the oldest of 7 children…it’s a big family! We were the first ones to marry and to have children. Until today when my little brother had his first baby, a son. On Saturday October 9, 2010 at 9:51am Trevor James Keith Hartzell came into the world! He is a perfect little pumpkin.
Now that I've had my chance to show off my perfect new nephew, I'll move on. This past week was very busy. I have been busy meal planning, and trying to find some new extra ways to be more productive. This week I bought 2 ½ dozen eggs on sale for $3.49 and a loaf of bread for .99 cents. I bought them specifically to make French toast sticks for weekday breakfast. This way even if we are running behind in the morning my son can still get a hot healthy breakfast before school.
So 12 eggs and 18 slices of bread later we have 18 yummy slices of French toast. I like to use the pizza cutter to cut each slice into 4 strips. The end result…72 French toast sticks for morning breakfasts during the school week. They keep well in the freezer, are easy enough for my son to prepare, costs less than buying them in the store, and I know what ingredients my kids are eating!
So maybe now that I have a few extra minutes in the mornings I'll be able to make myself a cup of coffee before heading out for the bus.
Friday, October 1, 2010
Life is full of B's
Anjali is turning 4 years old this December. That gives me only one more year to stay home with her than its off to pre-school for one year, then Kindergarten! I’ve created a lesson plan to help improve her basic knowledge and writing skills. Each week is a new letter and everything I do revolves around that letter. This week we have been focusing on the letter “B“.
Foods we have been eating are: Blueberry pancakes, Biscuits, Banana Bread, Bagels, Bologna, Peanut Butter Balls, and chocolate B’s.
Our big project was making Peanut Butter Balls, and I piped the letter “B” on each one. Then with our leftover chocolate I helped her pipe the letter “B” onto wax paper so she could have a yummy chocolate treat to bring to her Brother Baseball team or share with her Ballet class.
On her “scavenger hunt” she found: Bus Book, Bear, Bumble Bee, Balls, Babies, Bottles, Sponge Bob, and a Boat.
She traced the letter “B” on Blue paper with glue then applied the cheerios to it (only because I was completely out of beans!)
I also laminate (clear tape on each side) a cut-out of the letter we are doing. We take that letter everywhere with us. Each time she sees an object that starts with the her letter she pulls it out to show me. At ShopRite she found a Balloon and at the farm a Butterfly, Birds, and lots of Bees! She also loves to play hide in seek with the cut-out. I hide the letter (near an object that starts with it) and she has to find it.
Of course we have our worksheets and other basic skills we learn each week also, but this is my favorite part of teaching. She has fun doing it and so do I, and that’s what makes it work so well. Next week we move onto the letter…”L”.
Peanut Butter Balls
Mix 1/2 cup all-natural peanut butter, 1/3 cup homey, and 1 cup powered milk in bowl. Roll into 1" balls. Melt 6oz chocolate and dip balls into the chocolate. Place onto wax paper in the refridgerator until hardened.
Foods we have been eating are: Blueberry pancakes, Biscuits, Banana Bread, Bagels, Bologna, Peanut Butter Balls, and chocolate B’s.
| Peanut Butter Balls & Chocolate B's |
On her “scavenger hunt” she found: Bus Book, Bear, Bumble Bee, Balls, Babies, Bottles, Sponge Bob, and a Boat.
| Letter "B" scavenger hunt |
I also laminate (clear tape on each side) a cut-out of the letter we are doing. We take that letter everywhere with us. Each time she sees an object that starts with the her letter she pulls it out to show me. At ShopRite she found a Balloon and at the farm a Butterfly, Birds, and lots of Bees! She also loves to play hide in seek with the cut-out. I hide the letter (near an object that starts with it) and she has to find it.
| Letter "B" hide & seek |
Peanut Butter Balls
Mix 1/2 cup all-natural peanut butter, 1/3 cup homey, and 1 cup powered milk in bowl. Roll into 1" balls. Melt 6oz chocolate and dip balls into the chocolate. Place onto wax paper in the refridgerator until hardened.
Subscribe to:
Posts (Atom)