Friday, August 2, 2013

Cinnamon Sugar Pretzel bites & Salted Caramel dipping sauce!

Cinnamon Sugar Pretzel bites with Salted Caramel dipping sauce!


Pretzels:
1 1/2 cups warm water
1 Tbsp sugar
2 tsp salt
2 1/4 tsp instant yeast
4 1/2 cups flour
2 oz unsalted butter, melted
vegetable oil (for bowl and work surface)
10 cups of water
1/3 cup baking soda
2 Tbsp butter, melted
1/3 cup cinnamon sugar


Dipping Sauce:

2 cups granulated sugar
12 tablespoons unsalted butter, at room temperature, cut into pieces
1 cup heavy cream, at room temperature1 tablespoon sea salt


Pretzel bites:


1. In a bowl of a stand mixer with the paddle attachment, mix together water sugar salt and yeast on low speed for 10 seconds. Switch to the dough hook and add in the flour and butter. Mix on low speed until well combined. Change to medium speed and knead until the dough is smooth and pulls away from the sides of the bowl, about 4-5 min. Remove the dough from bowl and transfer to a well oiled bowl. Cover tightly with plastic wrap and place in a warm place for about 50-55 min or until the dough doubles in size. (we usually put the oven on 200 degrees for a few minutes then turn it off and place the bowl in the warm oven)


2. Put dough onto a slightly oiled work surface and divide into 8 equal pieces. Roll out each piece into a rope (about 18-24in long). Slice each rope into bite size pieces about 1 1/2 inches in length. Cover the cut pieces with a damp paper towel while working with the rest of the dough so it doesn't dry out.


3. Preheat oven to 425 degrees. Line 2 baking sheets with parchment paper (or use cooking spray) and set aside.


4. Bring the 10 cups of water and baking soda to a boil.


5. Using a slotted spoon lower a handful of pretzel bites into water and boil for 30 seconds, flipping them around in the water a few times. Remove from the water and blot dry with a paper towel and place onto baking sheet (making sure they do not touch each other). Bake until golden brown, about 10 min.


6. Place a colander into a larger bowl. Put a handful of pretzel bites into the colander and brush them with the melted butter. Sprinkle the cinnamon sugar onto the pretzels and shake around. (I use a very generous amount of cinnamon sugar here). Place in container or onto serving plate.


Dipping Sauce:


1. Be sure you have all of the ingredients ready. Once you start you must move quickly to avoid burning the sugar. First, heat the sugar over medium high-heat in the bottom of a heavy 2-3 quart saucepan. When the sugar starts to melt, start whisking the sugar. The sugar will clump up, but keep whisking. It will continue to melt. When the sugar is melted, stop whisking. You can swirl the pan to move the sugar around.


2. Cook the sugar until it reaches a deep amber color. Make sure you watch the pan very closely. This is where it is easy to burn the caramel. You want the caramel to reach 350 degrees F. If you are new to making caramel, I suggest using a thermometer.
3. As soon as the sugar reaches the dark amber color, carefully add the butter. Whisk until butter is melted. If the sugar gets stuck to the whisk, you can switch to a wooden spoon.
4. Remove the pan from the heat and slowly pour in the heavy cream. Whisk until cream is incorporated and caramel is smooth. Whisk in the sea salt.
5. Let the caramel sauce cool for about 10 minutes in the pan. Pour the caramel into a large jar and cool to room temperature. Put the salted caramel sauce in the refrigerator. Store the salted caramel sauce in the refrigerator for about a month.

I'm including the original blogs that we found the recipes on, for further questions or tips that you may have. Enjoy!

Friday, May 3, 2013

Dining room Buffet Table


Buffet Table
  
My final piece for the dining room was a buffet table. I wanted something simple made from real wood that I could redo myself…and with a low price tag. Something like this but with more open storage instead of so many drawers. 

"My Inspiration"


So I began my search on craigslist. It took about a week to find the one that was just right. I found it just 15 minutes away from a very nice man moving to Michigan…who was selling it for $25. It did have all 3 drawers when we bought it, two of them became firewood for my husband later that week.

before


 We got it home and gave it a good cleaning and sanding. We had to replace the bottom board with plywood for to create a bottom shelf. Then I painted the entire thing black to match our fireplace and new chandelier. Add a few coats of polyurethane to protect it from my children…and finished!


We already had the sanding, painting supplies. So the only new costs were for the dresser, the plywood, and new knobs…Total cost $30.


Monday, April 15, 2013

Dining Room Light Fixture


 Our Dining room was finally starting to come together. We had our fabulous Table, our already existing fireplace, and a new 8x10 rug that I got on clearance for only $39 at Home Depot (because our 5x8 wasn't  going to work with our new 8ft table!). Now we needed some sort of fixture over the table, a buffet for my “Nice dishes” and some sort of "art" to fill in the huge blank wall at the end of our table. Challenge accepted!

 I took the old brass chandelier that came with the house and spray painted it, then removed the glass and added some chandelier lamp shades that I found for $2 each, which by the way was very exciting! Online they were asking for $10 each shade…times 5 shades…are you kidding me! Guardian Angel Thrift store saved the day again. 

Old 

New


And Finally the finished product! More info on those fabulous pictures of the kids on my wall...later :)


Monday, March 25, 2013

DIY Dry Erase Calendar


This is pretty straight forward. I saw the picture, I liked the idea, I made it!

The Idea...

I used an old oak frame I bought at the thrift store for $1 (painted it white to match my “soon to be Kitchen theme”.  Then we went “shopping” at Lowes. I really did need paint for the kitchen walls, but my secondary goal was to score a bunch of free color samples for the Calendar. My kids are great at leaving the store with a million of these in hand! I made sure to get the ones that already had a small square cut out of them so I wouldn’t have to do it myself.

I put my son to work deciding what order the different shades of blue should go in. When he was done we taped them down to the paper in the frame, we went with a white background but any color paper or cloth can be used to match your décor. I wrote the days of the week and taped them down also but left the month and number spots blank to fill in with the dry erase marker. Then we put the back on, hung it up and got to writing.

...Our finished Dry Erase Calendar. 


I already had the white paint and white paper, plus the dry erase markers at home. The paint color samples were free. So the only thing I actually bought for this was the frame.  Total cost: $1 

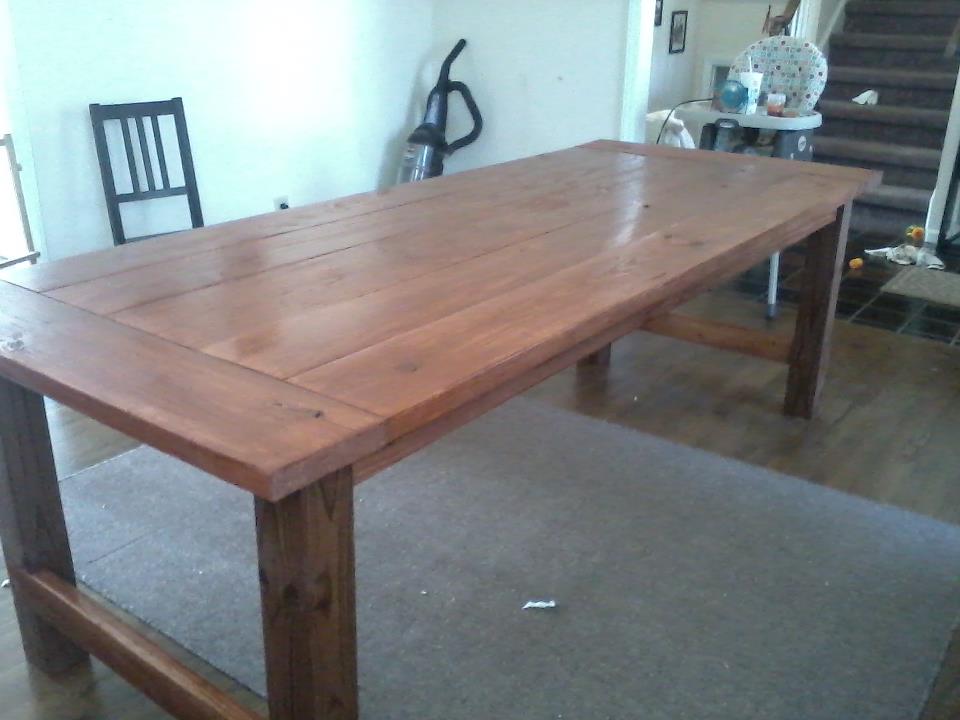
DIY Farmhouse Table...$130 total!


So I decided that at 30 years old, having 3 children now and buying our first home, that it was time for us to own a “grown up” table. Something that wasn't put together with a tool that is included in the box! I wanted a place that all of us could sit for meals and maybe even some extra room for guests when they visit. While I wasn't extremely picky about the look of the table (although my husband would probably disagree with that statement), I was very picky about how much I wanted to spend. I mean come on…why can’t I have a farmhouse style table that sits 8-10 people for under $300. Is that really asking too much? Apparently it was…so I had to either change my plans or change my budget.

Those who know me, know that I’m not great at compromising when I have a plan set in my mind. So I decided my very talented and handy husband could certainly find a way to get me that beautiful table and save us money. Boy was I right! I showed him the picture of what I wanted. 


I found it on Pinterest (where else!). He found the plans online at this wonderful website http://ana-white.com/2009/12/plans-farmhouse-table-knock-off-of.html, went off to Lowes to buy the wood, came home and made me a table right in our dining room in just 4 hrs!


After a good sanding I stained it with a color called gun stock  added polyurethane for protection, and viola…a masterpiece! I now have a beautiful 8 ft long farmhouse table that can fit our whole family plus guests. Our only change from the actual plans were to omit the stretcher (long piece of wood that runs under the table) because I could just picture my children hanging all over it!

Its huge! I'm in love

Bad lighting...sorry

Don't mind the mess


Total cost for the wood, a new toy (Kreg jig) my husband needed…oops I meant tool  ;)  the sanding materials and the stain/polyurethane I picked out came to…$130. I can’t even describe how many times I passed by the dining room just to look at it! 

Saturday, March 23, 2013

Black & Blue End Table ~ $11.50


Room, room and more room! I’m not complaining…but when you go from an 1200sqft apartment to a 2200sqft home…you seem to have a lot less furniture. I've never had a living room and separate family room before, so we are lacking in furniture. Our living room consisted only of a couch (my husband got a almost new black leather Lay z boy couch from a client for free) and an area rug that we moved from our dining room when we got our “grown up table” (that post will be coming soon…and it is Amazing!) Needless to say…it was lacking not just in furniture, but in character also. I knew I wanted to get an end table that I could “fix up”. Below is a picture of my "inspiration" from Pinterest. Its completely not the color or design I wanted but I loved that they added their own creativity to it. 


So I went to a few different thrift stores over the next week and finally found my diamond in the ruff. It was an old brown end table that had a faint smell of cigarettes…ugh. After some much needed cleaning and sanding, and airing out, it was ready to paint. I went with black (a reoccurring theme you will see throughout my home) and used some of the leftover paint from our bathroom redo to give it some character. Here is a picture of the wood before we started.


And here is the after shot. I love how it turned out, and in total it only cost me $10 for the table and $1.50 for new knobs…can’t beat $11.50. 


Out with the old...in with the Bathroom redo...$100


Well more than just my blog name has changed in the past 1 & ½ years! I’m now a Stay at home mother of three children…Baby William was born in July of 1012. Then a month later in August we bought our first home. Very exciting times but stressful and chaotic too!

One of the beautiful joys of home ownership and raising three children is no longer having money. Okay maybe I’m exaggerating but I definitely don’t enough money to decorate my home with the pottery barn and Pier one magazines that I’d like to. So that’s where Pinterest comes into play. Thousands of pins filled with inspiration just waiting for me to try!

One of our first big projects was the guest bathroom. Its kind of small and it was overpowered by dark wood, yellow tile, and a red laminate counter top…all original to the house! I loved the look of this bathroom  (picture below) I found while on Pinterest: http://pinterest.com/pin/179018153910148751/


I loved how the white stood out and looked so clean next to the cool blue. So we painted the walls with a beautiful blue, put in a smaller white vanity (on sale for $69 at Lowes), and put down laminate peel & stick tiles. In total we spent about $100…and it looks like a whole new space. 

Old Bathroom (the red counter peeking out in the corner)


Fresh and clean!


I Love It! And for just $100...it makes me love it even more. 

Wednesday, October 19, 2011

$4 Homemade Wall Art


     So when you first walk into my house there is a wall straight ahead that has an electrical panel on it. Why they couldn't move it a few feet into the closet...I will never understand. Anyway, I wanted some kind of art to hang there to cover it...without spending a lot of money. The problem was that in order to cover the panel and have the art centered on the space, it would need to be at least 24x36 and fit into our style and color theme!

     I saw a really cute Holiday idea for a mantle that used wooden blocks and thought it would be great if I could alter the idea to make wall art instead of tabletop decor. So I went to the dollar store for inspiration and thats when I found everything I needed.

Paper plates (I used black square plates) - $1
Red decorative filling - $1
Ribbon - $1
Bows (they were actually christmas ornaments) - $1

Total cost = $4


     It turned out really cute and fits the space and our decor perfectly. The best part was the overall price of only $4 and how easy it was to make. The kids loved watching me make it that they wanted to make one of their own. So I went today to pick up different colored plates plates, colored beads and different colored ribbon ofr my daughter and son to make one of their own for each of their bedrooms. I'll update later to let you know how that goes!

Tuesday, October 18, 2011

Stop and Smell the Roses

     Everyday on our walks we pass this same spot...Anjali always has to stop to pick a flower...this was the first day I stopped and realized that the leaves look like hearts...I think it was Gods way of telling me to slow down and enjoy ♥


Thursday, October 13, 2011

Apple picking

As I’ve said many times before fall is my favorite time of year. This is our first fall in North Carolina, and boy are things different down here! First of all the weather is nothing like NJ fall weather. Its been upper 70’s without fail everyday. They have many different pumpkin places and farms with fun family activities but one major thing is missing…Apple picking. I searches all over and found 1 orchard for self picking apples off the tree…it was an hour drive but worth it.


We drove to Millstone Creek Orchard in Ramseur, NC. Of course we got a late start into the season so many of the trees no longer had apples on them but they had a few left for us to pick…and many that had fallen off the tree but were in perfect condition. The kids had fun finding apples and playing on the farm. They had great tire swings set up and sand boxes made out of tractor wheels. My favorite part was the apple cider slushies, and they had great wine cake also. Overall we had a good time and came home with 6lbs of apples.


Then we had to decide what to do with all of those apples! So I created mini apple pies…kind of like the ones at McDonalds…maybe not as pretty…but good!


Tuesday, October 11, 2011

Pulled pork hotpockets

Pulled Pork Hot pockets

Ingredients:

1 can (16.3 oz) Flaky canned biscuits (1 can makes 8 pockets)
Pulled or roasted pork, chopped
1 Egg white
1 tsp Water
Your favorite BBQ seasoning/rub

Directions:

1. Preheat your oven to 350º.
2. Wisk the egg white and water together in a small bowl and set aside.
3. On a floured work surface, roll each biscuit into a six-inch round.
4. Place a few tablespoons of the pork on one half of each round.
5. Fold the exposed half of each round over the filling and pinch and roll to seal the edge
6. Arrange the pockets on a sheet pan leaving about an inch between each
7. Cut a one-inch slash in the top of each pocket
8. Brush the top and seams of each pocket with the egg wash and sprinkle with a little seasoning/rub. (we use salt for the kids)
9. Bake until golden brown (about 20 minutes)


Monday, September 26, 2011

Morning Glory Muffins...yummy treat with fruits & Veggies!


This is a great muffin recipe that has fruits and vegetables! A great way to start a day or a good snack in the middle of the day. There are many different ways to make this recipe but this is one is the way I love it. Another great way to get your kids to eat fruits and veggies!

Ingredients

1 egg
2 egg whites 
1 ¼ cup cinnamon applesauce **
2 Tbsps vegetable oil 
1 Tbsp vanilla extract 
1 1/2 cups all-purpose flour 
1/2 cup whole wheat flour 
1 cup white sugar 
1 tsp ground cinnamon 
2 tsp baking powder 
1/2 tsp baking soda 
1/2 tsp salt 
2 cups carrots peeled *
1 apple - peeled, cored 
1 cup dried unsweetened cranberries
2 tablespoons chopped walnuts 


Directions

1. Preheat oven to 375 degrees F (190 degrees C). Lightly oil 18 muffin cups, or coat with nonstick cooking spray. 
2. In a medium bowl, whisk together eggs, egg whites, applesauce, oil and vanilla. 
3. In a large bowl, stir together flours, sugar, cinnamon, baking powder, baking soda and salt. 
4. Put carrots and apple into food processor for a few pulses (I don’t like chunks but its your preference)
5. Stir applesauce mixture into dry ingredients just until moistened.
6. Add carrots, apples, cranberries and walnuts into batter and mix until evenly distributed.   
7. Spoon the batter into the prepared muffin cups, filling them about 3/4 full. 
8. Bake at 375 degrees F (190 degrees C) for 15 to 20 minutes, or until the tops are golden and spring back when lightly pressed. 


* If you are feeling very brave you can cut the carrots down to 1 cup and add in 1 cup of zucchini or sweet potato J  

** I have also recently discovered Fruitastics Mixed Berry sauce. Each cup contains 1 fruit and vegetable serving with no added sugar. Tastes like regular flavored applesauce.

Saturday, September 24, 2011

Baked Chicken Ziti

Dinner last night was a yummy crock pot whole chicken. Of course even with the 4 of us we always seem to have chicken left over. Just enough to not want to throw it away but never enough to make a full meal out of it! So today I decied to make a Baked Chicken Ziti. Simple easy meal that everyone loves, and a good way to use the leftover chicken. I basically just replaced the ground beef in my normal ziti recipe with the left over shredded chicken. Yummy :)

Ingredients:

1-2 cups of leftover chicken (shredded)
1 jar meatless sauce 
½ cup
chicken broth 
1 teaspoon dried oregano leaves 
1 (16 ounce) package ziti pasta, cooked and drained 
2 cups shredded mozzarella cheese (I use double the amount of cheese)
1 cup grated parmesan cheese

Directions:

1. Preheat oven to 350 degrees F. 
2 . Stir together spaghetti sauce, chicken broth, oregano, and chicken pieces. Cook until chicken is hot and tender again. Remove from heat and add in grated parmesan cheese.
3. Stir 1 cup of the sauce into the cooked ziti noodles. 
4. The layer into 13x9x2 in baking dish as directed:  

½ of the ziti noodles 
½ of the mozzarella cheese
½ of the sauce
Remaining ziti mixture
Remaining sauce. 

7. Cover and bake 20 minutes. 
8. Remove and sprinkle with remaining mozzarella. 
9. Return to oven and bake uncovered for 10 minutes or until heated through.

Served with a nice fresh salad and some yummy garlic bread, makes a great meal. Enjoy :)

Friday, September 16, 2011

I'm Back....for good :)

I don't even know where to start! My husband and I just relocated 2 weeks ago to Cary NC from New Jersey. What a busy month it has been. I not only packed an entire house by myself (my husband moved down almost 2 weeks before us) but I also drove the 7hrs with 2 kids and a cat at midnight! But we made it in one piece, Thank the Lord. We lived in a guest suite for a week before our place was ready...a horrible feeling...never able t make yourself at home! Now we are finally in our home and it is coming along. I hate boxes and clutter so of course I've already almost finished unpacking and decorating. My son is on his second week of school and Anjali is still home with me...for now. And as if we didn't have enough on our plate we went and got a puppy! She is a 5 month old black lab mix and really a good dog...unless you my cat... then she is devil! At least she sleeps through the night and is 99% house trained....or I may have lost my mind by now...lol!

North Carolina has been great. Our neighborhood has an indoor and outdoor pool, so my children think that this is heaven. We have stores within walking distance and if you do need to venture out in a car then I swear the number of stores here out number the amount of residents! It has been in the upper 80's since we got here, which was nice because we have been able to go swimming out side everyday after school. But I woke up this morning to a very brisk 60 degrees...it finally felt like September. This is truly my favorite time of year...I love the Fall & Holiday season.

So I'm back into my normal school year routine. Back to my blog....maybe not daily but hopefully a few times a week. Thanks for reading

Wednesday, July 6, 2011

Frosted Watermelon Treats

Frosted Watermelon

Watermelon cut into slices (not thicker than your cookie cutter)
Yogurt
Granola or sprinkles


1. Using your favorite cookie cutters cut shapes out of the slices of watermelon. 

2. Frost with vanilla or other flavor yogurt. 

3. Sprinkle with granola or sprinkles


Although I don't have any problems getting my children to eat fruits or vegetables it is nice to give them a change every once in awhile. This is a new fun way to eat watermelon. My kids had a blast making them and eating them.

Frozen Yogurt Popsicle

Frozen Yogurt Berry Popsicles
2 cups plain yogurt
2 cups berries (blueberry, strawberry, cherries, raspberry)
½ cup confectioners sugar


Combine yogurt, fruit (I only use 1 fruit for each batch so I’m not sure how it tastes all together, but I’m sure it would be fine) and sugar in a blender and process until smooth. Place into ice pop molds and freeze. Then enjoy! 


This is a wonderful recipe from Deceptively Delicious. Each popsicle only has 100 calories and less than 1 gram of fat! Not to mention the calcium and vitamin C…a great healthy snack.


Making Homemade Chalk

Homemade Chalk

Toilet tissue tube or ice cube tray

Aluminum foil if you are using a toilet paper tube 
Petroleum jelly if you're using an ice cube tray
Disposable plastic container 
Plaster of Paris 
Duct tape 
Liquid tempera paint 
Water 
Spoon 


1. Cover one end of the toilet paper tube with duct tape. Loosely roll an 8- by-41/2-inch piece of aluminum foil and slip it into the tube so that it lines the inside, fitting snugly. (Or coat the inside of the ice cube tray with petroleum jelly.) 

2. Set tube upright (duct tape side down) on protected surface. 

3. In a disposable plastic container, help your child mix 1 cup plaster of Paris with 1/2 cup water. Stir slowly and thoroughly until plaster is dissolved, about 1 minute. 

4. Immediately add 2 tablespoons paint (or more for brighter chalk color, but be careful it can stain). Mix thoroughly. 

5. Spoon into the tube (or ice cube tray). Tap gently so mixture settles to the bottom. 

Let dry overnight before using.


Monday, March 7, 2011

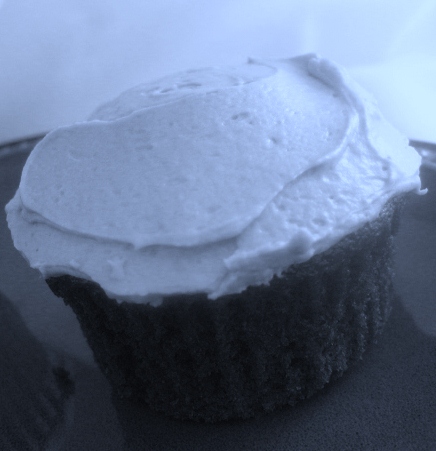
St Patrick's Day crafts & Chocolate Guinness Cupcakes

     So its been a very busy few months here. I have been slacking with my blog and I hope to catch up soon. Right now in our home we are focusing on St Patrick’s Day. Of course we always have our corned beef and cabbage with soda bread. I usually make some kind of yummy green treat and maybe some mint chocolate chip ice cream. This year I have decided to try something new for dessert Chocolate Guinness Cupcakes…to go along with our ice cream. 

     Anjali has been working on a few crafts to decorate our home. The first one we made was a rainbow, made out of Froot Loops. The clouds are her hand prints in white paint. She had a blast making this one…not to mention ruining her lunch by eating half the Froot Loops! I suggest doing this at snack time…with a separate bowl for “eating” ones…just to be safe when using glue.


     The second project was a shamrock. We had yellow and blue paint and discovered what happens when you mix the two together. Nothing really special here but a good color learning project. We cut it out and hung it on the front door.


     The third project we completed so far is Goodluck Bear from the Care Bears. I had her spread glue over the entire picture then she covered the whole things with pieces of crepe paper (or you can use green tissue paper). She had fun tearing the pieces before hand and then sticking them on the glue. It turned out cute, we cut it out and put it onto pink construction paper. We will be doing this same process with shamrocks later this week. For the shamrocks I don’t use construction paper, just plain computer paper so when we hang them in the window they become kind of translucent. Very pretty window decorations.


Chocolate Guinness Cupcakes Recipe

Cupcake Ingredients:
2 large eggs, at room temperature 
1/2 cup plain yogurt, at room temperature 
6 oz. dark stout (like Guinness), at room temperature (*measure after the foam has settled) 
2 tsp. vanilla extract 
1/2 cup cocoa powder 
1 cup sugar 
1 1/4 cups all-purpose flour 
1 tsp. baking soda 
1/8 tsp. ground cinnamon 
6 Tbsp. butter, melted

Frosting Ingredients:
8 ounces cream cheese, at room temperature 
4 Tbsp. butter, at room temperature 
4 cups powdered sugar 
1 tsp. vanilla extract

Directions: 
1. Preheat oven to 350 degrees. Line a 12-cup cupcake pan with cupcake papers; spray the whole thing including the cupcake papers, with nonstick spray. Set aside. 
2. Melt butter in microwave or on stovetop, then set aside.
3. In a mixing bowl, whisk together eggs and yogurt. Add beer and vanilla whisk until well combined.
4. Sift all the dry ingredients together (cocoa powder, sugar, flour, baking soda, and cinnamon) into a separate bowl.
5. Add about a third of the flour mixture into the wet ingredients and blend well using a mixer on low speed, or a hand mixer. Add the rest of the flour mixture, a third at a time, mixing well after each addition. When all ingredients are blended, add the melted butter then continue mixing until very well combined.
6. Pour batter into the 12 cups, filling each only about 3/4 full. Bake on center rack of the preheated 350 degree oven and for approximately 25 minutes. When cupcakes are done (toothpick inserted in center of a cupcake will come out clean), let cool for ten minutes then remove cupcakes from pan and let them cool completely on wire rack.

To make the Frosting:
1. In a medium bowl, blend together cream cheese, butter, and vanilla. 
2. Gradually add powdered sugar, mixing well until it’s all incorporated. * Use immediately


Friday, January 21, 2011

Free purse book, Valentines Day & Raspberry Oatmeal Bars!

     I love free or close to free stuff…who doesn’t! Today I ordered a purse photo book from Walgreens for free. It’s a great gift that I plan on giving my mother and grandmother, neither of them being iphone “compatible“, for Mothers Day. The code can be used multiple times, all I paid was $3.20 for tax and shipping…which means I don’t even have to travel to Walgreens for my photo book! 

(1) 4.5” x 6” Purse book = $6.99
Coupon code: Purse = -$6.99
Standard S&H = $2.99
Sales Tax = $0.21
-------------------------------------------
Total Price = $3.20


For the next month I will be in “Love” mode. I will be planning Valentines Day crafts for the kids to do. I have a fun song that I sing with Anjali, along with cut out hearts that we use as visual. This teaches her color, shape, and numbers. The picture and song below are for red but I cut out every color of the rainbow to use for this song.
Hearts! (Tune: 1 little 2 little 3 little Indians) 
One red, two red, three red hearts, 
Four red, Five red, Six red hearts, 
Seven red, eight red, nine red hearts
Ten red hearts for you!

~ Repeat with all different colors.


     This weeks homemade treat is Raspberry Oatmeal Bars. They are very yummy with the original recipe but I will be altering them this weekend to include ½ cup of pureed beets. I’m a little nervous about this one so I will be posting the taste results after I do it… Stay tuned! Until then enjoy the original recipe below.

Raspberry Oatmeal Bars

2 cups Old Fashioned oats
1 ¼ cup flour
½ cup sugar
½ teaspoon cinnamon
½ tsp baking powder
¼ tsp salt
1 tsp vanilla extract
¾ cup spread able margarine
1 cup raspberry preserves
1 cup dried cranberries (optional)
1. Preheat oven to 375 degrees. Coat baking pan with cooking spray.
2. In a large bowl combine oats, flour, sugar, cinnamon, baking powder, salt, and vanilla. Stir well. 
3. Add the margarine in quickly until the ingredients are not powdery any more. Do not over mix, some of the margarine may still be visible. 
4. Take about ½ of the oat mixture and press it into the bottom of the pan firmly. Bake about 13 minutes. The edges will be lightly brown but not fully baked.
5. Spread the raspberry preserves over the baked oat layer. Then sprinkle the remaining oat mixture over the preserves. (I like to add dried cranberries to the remaining oat mixture before sprinkling over the preserves) Bake for about 20-25 minutes or until golden brown.
6. Let pan cool completely before cutting into bars. Serve and enjoy J