Wednesday, October 19, 2011

$4 Homemade Wall Art


     So when you first walk into my house there is a wall straight ahead that has an electrical panel on it. Why they couldn't move it a few feet into the closet...I will never understand. Anyway, I wanted some kind of art to hang there to cover it...without spending a lot of money. The problem was that in order to cover the panel and have the art centered on the space, it would need to be at least 24x36 and fit into our style and color theme!

     I saw a really cute Holiday idea for a mantle that used wooden blocks and thought it would be great if I could alter the idea to make wall art instead of tabletop decor. So I went to the dollar store for inspiration and thats when I found everything I needed.

Paper plates (I used black square plates) - $1
Red decorative filling - $1
Ribbon - $1
Bows (they were actually christmas ornaments) - $1

Total cost = $4


     It turned out really cute and fits the space and our decor perfectly. The best part was the overall price of only $4 and how easy it was to make. The kids loved watching me make it that they wanted to make one of their own. So I went today to pick up different colored plates plates, colored beads and different colored ribbon ofr my daughter and son to make one of their own for each of their bedrooms. I'll update later to let you know how that goes!

Tuesday, October 18, 2011

Stop and Smell the Roses

     Everyday on our walks we pass this same spot...Anjali always has to stop to pick a flower...this was the first day I stopped and realized that the leaves look like hearts...I think it was Gods way of telling me to slow down and enjoy ♥


Thursday, October 13, 2011

Apple picking

As I’ve said many times before fall is my favorite time of year. This is our first fall in North Carolina, and boy are things different down here! First of all the weather is nothing like NJ fall weather. Its been upper 70’s without fail everyday. They have many different pumpkin places and farms with fun family activities but one major thing is missing…Apple picking. I searches all over and found 1 orchard for self picking apples off the tree…it was an hour drive but worth it.


We drove to Millstone Creek Orchard in Ramseur, NC. Of course we got a late start into the season so many of the trees no longer had apples on them but they had a few left for us to pick…and many that had fallen off the tree but were in perfect condition. The kids had fun finding apples and playing on the farm. They had great tire swings set up and sand boxes made out of tractor wheels. My favorite part was the apple cider slushies, and they had great wine cake also. Overall we had a good time and came home with 6lbs of apples.


Then we had to decide what to do with all of those apples! So I created mini apple pies…kind of like the ones at McDonalds…maybe not as pretty…but good!


Tuesday, October 11, 2011

Pulled pork hotpockets

Pulled Pork Hot pockets

Ingredients:

1 can (16.3 oz) Flaky canned biscuits (1 can makes 8 pockets)
Pulled or roasted pork, chopped
1 Egg white
1 tsp Water
Your favorite BBQ seasoning/rub

Directions:

1. Preheat your oven to 350ยบ.
2. Wisk the egg white and water together in a small bowl and set aside.
3. On a floured work surface, roll each biscuit into a six-inch round.
4. Place a few tablespoons of the pork on one half of each round.
5. Fold the exposed half of each round over the filling and pinch and roll to seal the edge
6. Arrange the pockets on a sheet pan leaving about an inch between each
7. Cut a one-inch slash in the top of each pocket
8. Brush the top and seams of each pocket with the egg wash and sprinkle with a little seasoning/rub. (we use salt for the kids)
9. Bake until golden brown (about 20 minutes)


Monday, September 26, 2011

Morning Glory Muffins...yummy treat with fruits & Veggies!


This is a great muffin recipe that has fruits and vegetables! A great way to start a day or a good snack in the middle of the day. There are many different ways to make this recipe but this is one is the way I love it. Another great way to get your kids to eat fruits and veggies!

Ingredients

1 egg
2 egg whites 
1 ¼ cup cinnamon applesauce **
2 Tbsps vegetable oil 
1 Tbsp vanilla extract 
1 1/2 cups all-purpose flour 
1/2 cup whole wheat flour 
1 cup white sugar 
1 tsp ground cinnamon 
2 tsp baking powder 
1/2 tsp baking soda 
1/2 tsp salt 
2 cups carrots peeled *
1 apple - peeled, cored 
1 cup dried unsweetened cranberries
2 tablespoons chopped walnuts 


Directions

1. Preheat oven to 375 degrees F (190 degrees C). Lightly oil 18 muffin cups, or coat with nonstick cooking spray. 
2. In a medium bowl, whisk together eggs, egg whites, applesauce, oil and vanilla. 
3. In a large bowl, stir together flours, sugar, cinnamon, baking powder, baking soda and salt. 
4. Put carrots and apple into food processor for a few pulses (I don’t like chunks but its your preference)
5. Stir applesauce mixture into dry ingredients just until moistened.
6. Add carrots, apples, cranberries and walnuts into batter and mix until evenly distributed.   
7. Spoon the batter into the prepared muffin cups, filling them about 3/4 full. 
8. Bake at 375 degrees F (190 degrees C) for 15 to 20 minutes, or until the tops are golden and spring back when lightly pressed. 


* If you are feeling very brave you can cut the carrots down to 1 cup and add in 1 cup of zucchini or sweet potato J  

** I have also recently discovered Fruitastics Mixed Berry sauce. Each cup contains 1 fruit and vegetable serving with no added sugar. Tastes like regular flavored applesauce.

Saturday, September 24, 2011

Baked Chicken Ziti

Dinner last night was a yummy crock pot whole chicken. Of course even with the 4 of us we always seem to have chicken left over. Just enough to not want to throw it away but never enough to make a full meal out of it! So today I decied to make a Baked Chicken Ziti. Simple easy meal that everyone loves, and a good way to use the leftover chicken. I basically just replaced the ground beef in my normal ziti recipe with the left over shredded chicken. Yummy :)

Ingredients:

1-2 cups of leftover chicken (shredded)
1 jar meatless sauce 
½ cup
chicken broth 
1 teaspoon dried oregano leaves 
1 (16 ounce) package ziti pasta, cooked and drained 
2 cups shredded mozzarella cheese (I use double the amount of cheese)
1 cup grated parmesan cheese

Directions:

1. Preheat oven to 350 degrees F. 
2 . Stir together spaghetti sauce, chicken broth, oregano, and chicken pieces. Cook until chicken is hot and tender again. Remove from heat and add in grated parmesan cheese.
3. Stir 1 cup of the sauce into the cooked ziti noodles. 
4. The layer into 13x9x2 in baking dish as directed:  

½ of the ziti noodles 
½ of the mozzarella cheese
½ of the sauce
Remaining ziti mixture
Remaining sauce. 

7. Cover and bake 20 minutes. 
8. Remove and sprinkle with remaining mozzarella. 
9. Return to oven and bake uncovered for 10 minutes or until heated through.

Served with a nice fresh salad and some yummy garlic bread, makes a great meal. Enjoy :)

Friday, September 16, 2011

I'm Back....for good :)

I don't even know where to start! My husband and I just relocated 2 weeks ago to Cary NC from New Jersey. What a busy month it has been. I not only packed an entire house by myself (my husband moved down almost 2 weeks before us) but I also drove the 7hrs with 2 kids and a cat at midnight! But we made it in one piece, Thank the Lord. We lived in a guest suite for a week before our place was ready...a horrible feeling...never able t make yourself at home! Now we are finally in our home and it is coming along. I hate boxes and clutter so of course I've already almost finished unpacking and decorating. My son is on his second week of school and Anjali is still home with me...for now. And as if we didn't have enough on our plate we went and got a puppy! She is a 5 month old black lab mix and really a good dog...unless you my cat... then she is devil! At least she sleeps through the night and is 99% house trained....or I may have lost my mind by now...lol!

North Carolina has been great. Our neighborhood has an indoor and outdoor pool, so my children think that this is heaven. We have stores within walking distance and if you do need to venture out in a car then I swear the number of stores here out number the amount of residents! It has been in the upper 80's since we got here, which was nice because we have been able to go swimming out side everyday after school. But I woke up this morning to a very brisk 60 degrees...it finally felt like September. This is truly my favorite time of year...I love the Fall & Holiday season.

So I'm back into my normal school year routine. Back to my blog....maybe not daily but hopefully a few times a week. Thanks for reading

Wednesday, July 6, 2011

Frosted Watermelon Treats

Frosted Watermelon

Watermelon cut into slices (not thicker than your cookie cutter)
Yogurt
Granola or sprinkles


1. Using your favorite cookie cutters cut shapes out of the slices of watermelon. 

2. Frost with vanilla or other flavor yogurt. 

3. Sprinkle with granola or sprinkles


Although I don't have any problems getting my children to eat fruits or vegetables it is nice to give them a change every once in awhile. This is a new fun way to eat watermelon. My kids had a blast making them and eating them.

Frozen Yogurt Popsicle

Frozen Yogurt Berry Popsicles
2 cups plain yogurt
2 cups berries (blueberry, strawberry, cherries, raspberry)
½ cup confectioners sugar


Combine yogurt, fruit (I only use 1 fruit for each batch so I’m not sure how it tastes all together, but I’m sure it would be fine) and sugar in a blender and process until smooth. Place into ice pop molds and freeze. Then enjoy! 


This is a wonderful recipe from Deceptively Delicious. Each popsicle only has 100 calories and less than 1 gram of fat! Not to mention the calcium and vitamin C…a great healthy snack.


Making Homemade Chalk

Homemade Chalk

Toilet tissue tube or ice cube tray

Aluminum foil if you are using a toilet paper tube 
Petroleum jelly if you're using an ice cube tray
Disposable plastic container 
Plaster of Paris 
Duct tape 
Liquid tempera paint 
Water 
Spoon 


1. Cover one end of the toilet paper tube with duct tape. Loosely roll an 8- by-41/2-inch piece of aluminum foil and slip it into the tube so that it lines the inside, fitting snugly. (Or coat the inside of the ice cube tray with petroleum jelly.) 

2. Set tube upright (duct tape side down) on protected surface. 

3. In a disposable plastic container, help your child mix 1 cup plaster of Paris with 1/2 cup water. Stir slowly and thoroughly until plaster is dissolved, about 1 minute. 

4. Immediately add 2 tablespoons paint (or more for brighter chalk color, but be careful it can stain). Mix thoroughly. 

5. Spoon into the tube (or ice cube tray). Tap gently so mixture settles to the bottom. 

Let dry overnight before using.


Monday, March 7, 2011

St Patrick's Day crafts & Chocolate Guinness Cupcakes

     So its been a very busy few months here. I have been slacking with my blog and I hope to catch up soon. Right now in our home we are focusing on St Patrick’s Day. Of course we always have our corned beef and cabbage with soda bread. I usually make some kind of yummy green treat and maybe some mint chocolate chip ice cream. This year I have decided to try something new for dessert Chocolate Guinness Cupcakes…to go along with our ice cream. 

     Anjali has been working on a few crafts to decorate our home. The first one we made was a rainbow, made out of Froot Loops. The clouds are her hand prints in white paint. She had a blast making this one…not to mention ruining her lunch by eating half the Froot Loops! I suggest doing this at snack time…with a separate bowl for “eating” ones…just to be safe when using glue.


     The second project was a shamrock. We had yellow and blue paint and discovered what happens when you mix the two together. Nothing really special here but a good color learning project. We cut it out and hung it on the front door.


     The third project we completed so far is Goodluck Bear from the Care Bears. I had her spread glue over the entire picture then she covered the whole things with pieces of crepe paper (or you can use green tissue paper). She had fun tearing the pieces before hand and then sticking them on the glue. It turned out cute, we cut it out and put it onto pink construction paper. We will be doing this same process with shamrocks later this week. For the shamrocks I don’t use construction paper, just plain computer paper so when we hang them in the window they become kind of translucent. Very pretty window decorations.


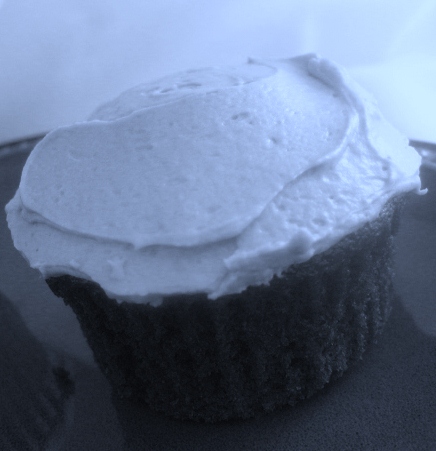
Chocolate Guinness Cupcakes Recipe

Cupcake Ingredients:
2 large eggs, at room temperature 
1/2 cup plain yogurt, at room temperature 
6 oz. dark stout (like Guinness), at room temperature (*measure after the foam has settled) 
2 tsp. vanilla extract 
1/2 cup cocoa powder 
1 cup sugar 
1 1/4 cups all-purpose flour 
1 tsp. baking soda 
1/8 tsp. ground cinnamon 
6 Tbsp. butter, melted

Frosting Ingredients:
8 ounces cream cheese, at room temperature 
4 Tbsp. butter, at room temperature 
4 cups powdered sugar 
1 tsp. vanilla extract

Directions: 
1. Preheat oven to 350 degrees. Line a 12-cup cupcake pan with cupcake papers; spray the whole thing including the cupcake papers, with nonstick spray. Set aside. 
2. Melt butter in microwave or on stovetop, then set aside.
3. In a mixing bowl, whisk together eggs and yogurt. Add beer and vanilla whisk until well combined.
4. Sift all the dry ingredients together (cocoa powder, sugar, flour, baking soda, and cinnamon) into a separate bowl.
5. Add about a third of the flour mixture into the wet ingredients and blend well using a mixer on low speed, or a hand mixer. Add the rest of the flour mixture, a third at a time, mixing well after each addition. When all ingredients are blended, add the melted butter then continue mixing until very well combined.
6. Pour batter into the 12 cups, filling each only about 3/4 full. Bake on center rack of the preheated 350 degree oven and for approximately 25 minutes. When cupcakes are done (toothpick inserted in center of a cupcake will come out clean), let cool for ten minutes then remove cupcakes from pan and let them cool completely on wire rack.

To make the Frosting:
1. In a medium bowl, blend together cream cheese, butter, and vanilla. 
2. Gradually add powdered sugar, mixing well until it’s all incorporated. * Use immediately


Friday, January 21, 2011

Free purse book, Valentines Day & Raspberry Oatmeal Bars!

     I love free or close to free stuff…who doesn’t! Today I ordered a purse photo book from Walgreens for free. It’s a great gift that I plan on giving my mother and grandmother, neither of them being iphone “compatible“, for Mothers Day. The code can be used multiple times, all I paid was $3.20 for tax and shipping…which means I don’t even have to travel to Walgreens for my photo book! 

(1) 4.5” x 6” Purse book = $6.99
Coupon code: Purse = -$6.99
Standard S&H = $2.99
Sales Tax = $0.21
-------------------------------------------
Total Price = $3.20


For the next month I will be in “Love” mode. I will be planning Valentines Day crafts for the kids to do. I have a fun song that I sing with Anjali, along with cut out hearts that we use as visual. This teaches her color, shape, and numbers. The picture and song below are for red but I cut out every color of the rainbow to use for this song.
Hearts! (Tune: 1 little 2 little 3 little Indians) 
One red, two red, three red hearts, 
Four red, Five red, Six red hearts, 
Seven red, eight red, nine red hearts
Ten red hearts for you!

~ Repeat with all different colors.


     This weeks homemade treat is Raspberry Oatmeal Bars. They are very yummy with the original recipe but I will be altering them this weekend to include ½ cup of pureed beets. I’m a little nervous about this one so I will be posting the taste results after I do it… Stay tuned! Until then enjoy the original recipe below.

Raspberry Oatmeal Bars

2 cups Old Fashioned oats
1 ¼ cup flour
½ cup sugar
½ teaspoon cinnamon
½ tsp baking powder
¼ tsp salt
1 tsp vanilla extract
¾ cup spread able margarine
1 cup raspberry preserves
1 cup dried cranberries (optional)
1. Preheat oven to 375 degrees. Coat baking pan with cooking spray.
2. In a large bowl combine oats, flour, sugar, cinnamon, baking powder, salt, and vanilla. Stir well. 
3. Add the margarine in quickly until the ingredients are not powdery any more. Do not over mix, some of the margarine may still be visible. 
4. Take about ½ of the oat mixture and press it into the bottom of the pan firmly. Bake about 13 minutes. The edges will be lightly brown but not fully baked.
5. Spread the raspberry preserves over the baked oat layer. Then sprinkle the remaining oat mixture over the preserves. (I like to add dried cranberries to the remaining oat mixture before sprinkling over the preserves) Bake for about 20-25 minutes or until golden brown.
6. Let pan cool completely before cutting into bars. Serve and enjoy J


Thursday, January 13, 2011

Brazilian Carrot Cake = yummy!

     So I’ve been trying to find easy ways to add extra vegetable and fruit servings into our daily routine. Those who know me know that my husband’s mother is from Brazil. During our visits his grandmother always makes Bolo de Cenoura or Carrot Cake. Their version is very different than the carrot cake we are used to here in America. So here is the recipe for Brazilian Carrot Cake that is easy and has about 3 servings of carrots in it.

Ingredients
3 eggs
3 medium/large carrots grated
1 & ½ cup sugar
¾ cup oil
2 cups flour
1 Tbsp baking powder
½ Tsp cinnamon (they don’t use this in Brazil but I like it)

1. Mix all ingredients together in blender (except the flour and baking powder.) 
2. Pour mixture into a bowl, sift 2 cups flour and the baking powder into the mixture, mix well for about 2 minutes.
3. Grease a pan and sprinkle with flour. Pour batter into pan
4. Bake 350 degrees for 30-40 minutes, until cake is golden brown. If a toothpick comes out clean and it is good.

Icing (easy way!) 
2 tablespoons butter or margarine
1 cup white sugar
1 cup instant hot cocoa mix
3/4 cup milk

Make the icing by placing the butter, 1 cup sugar, instant hot chocolate drink mix, and milk in a pan. While stirring, heat to almost boiling over medium-high heat until mixture thickens. When the cake is done, remove it from the oven and spread the icing evenly over the top immediately.

Friday, January 7, 2011

New for 2011

     The Holidays have ended and we are now back to “normal” everyday life. My resolution this year is to be more Aware. I know that sounds very vague but that was intentional. I want to be more aware of the ingredients I use to feed my family, keeping us healthy. I want to be more aware of the people in our communities that I can help, whether it be with money, time, or donations. I want to be more aware of the money I’m spending, deciding more carefully if it’s truly necessary spending. I want to be more aware of my stress and personal health, learning how to balance my life. I want to be more aware of my expectations of others, making my expectations reasonable and clear. I want to be more aware of my personal relationships, making more effort to keep my loved ones updated and in touch. I could go on forever… So now you may understand why I made it so vague! 

     So as a small start we have started making Smoothies each day, each one containing 1 serving of vegetables and 3 servings of fruit…in just 1 drink! We are once again donating our gently used books to the local children’s clinic, our used toys and clothes to the shelter, and again sponsoring a child’s birthday. I have been doing great with our budget, saving is like a game to me. My goal in the next month or two is to plan our summer vacations and outings…this way I can determine the budget needed for our family time. I think I may even give in this year and try a camping weekend…I’m trying to be brave! 

     I wish I could say that I have started a work out routine but I’d be lying. So my goal is to make a schedule of “mommy time” that will include my work-outs and a little bit of quite alone time for just me. A happy mommy is a happy family, right? I will have that done and started by February 1st

     I recently created a daily expectations list that I post up on the refrigerator. It has each of our names on it and underneath each name is my expectations for that person that day. Some days may have nothing and other days have a few things written down. I was tired of coming home from the pharmacy at 10pm and being angry that the clothes were still sitting in the dryer…but I realized if I never asked for it to be done then I shouldn’t have automatically expected it to be done. This list seems to be a great way to prevent silly arguments and stress building up inside.

     As for personal relationships…that one is harder. With family spread out all over the country it is hard to find time to keep everyone updated. So beside face book, my blog, and email I have set up a Family website. It allows me to upload all of our pictures, videos, and keep a journal. Invited guests can go on when ever they wish and see what is new and even order pictures from the site. Then once a week they receive a McAllister Family update in their email. While I’d prefer to see or talk in person this seems to make it feel a little more personal.


Yummy 6 layer Dip

1 (1 ounce) package taco seasoning mix 
1 (16 ounce) can refried beans 
1 (8 ounce) package cream cheese, softened 
1 (16 ounce) container sour cream 
1 (16 ounce) jar salsa 
1 (16oz) Guacamole
2 cups of Shredded Cheese (Your favorite)
2 cups shredded Cheddar cheese

Directions
Layer 1: blend ½ taco seasoning mix and refried beans.
Layer 2: Mix the sour cream, cream cheese and ½ packet seasoning together
Layer 3: Shredded Cheese (I like Pepper Jack here)
Layer 4: Guacamole
Layer 5: Salsa
Layer 6: Shredded Cheddar cheese

Bake @350 until cheese is melted (about 20 minutes for me)